May 6, 2023
In a recent article, I shared how we managed to cut the average costs of our Webflow projects by around 30%.
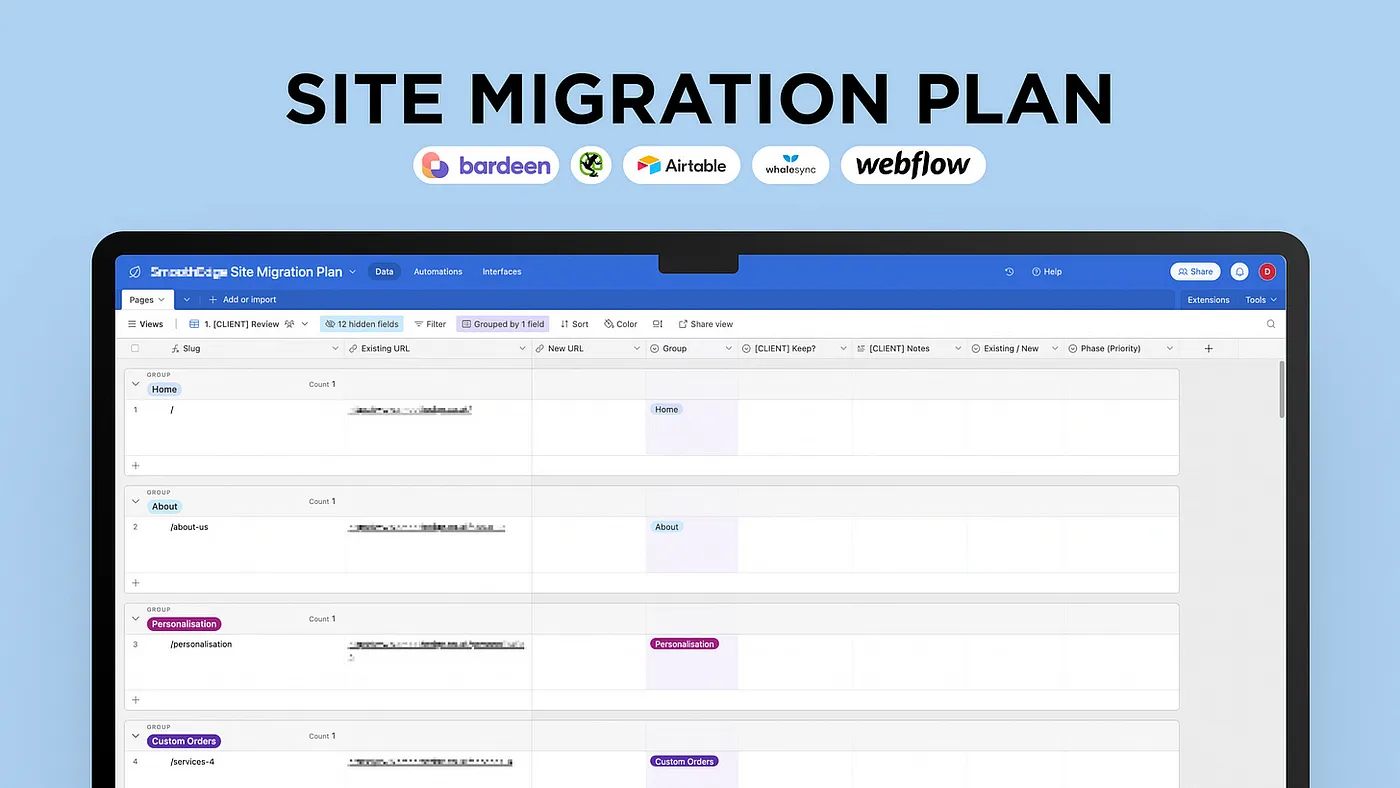
This time, I’ll delve deeper and reveal one of the internal tools that helps us stay organised and automates time-consuming, repetitive tasks during the discovery stages — introducing the Site Migration Plan.
The Site Migration Plan is a no-code tool built in Airtable and it does exactly what its name suggests. It streamlines the migration of existing sites built on platforms like WordPress, Wix, Squarespace, or others into Webflow. The tool also syncs with various low/no-code tools, granting Airtable superpowers like pulling in data from web scraper tools like Bardeen and generating AI-powered SEO tags via Data-fetcher and OpenAI. Let’s dive in…
Step 1: Starting with Screaming Frogs
This process begins with Screaming Frog, a peculiarly named SEO tool that allows us to scrape existing URLs (and other data) into a spreadsheet. Once we have the data consolidated, we use Google Sheets to filter out irrelevant columns, then download the data again as a CSV file.
Step 2: Transitioning to Airtable
Next, we move to Airtable. We’ve created a handy template with all the columns we use for managing projects, which we duplicate and reuse for each new project. We then import our cleaned-up URLs CSV into Airtable via the CSV upload extension, match the fields to pull the URLs, and voilà!
Step 3: Organising with Grouping and Filtering
With all our URLs in the Site Migration Plan, we use Airtable’s grouping and filtering features to organise pages based on their location on the existing site. This step, while not mandatory, helps create a more visual representation and encourages clients to provide feedback.
Step 4: Automating SEO Tags
To avoid forgetting to add SEO tags to pages in Webflow, we’ve built this neat little add-on to the Site Migration Plan in Airtable. It generates AI-powered titles and descriptions using the OpenAI API in just a few seconds. Impressive, right?
Step 5: Populating Webflow CMS with Data
For populating the new website, we use the Webflow CMS to manage everything in one place. To get the data into Webflow, we first source and organise it, creating additional pages for each category (e.g., product info, team info). We then use tools like Bardeen.ai to scrape data from the existing site and push it directly into Airtable, or manually add the data ourselves. Once organised, these data tables can be imported into Webflow CMS collections using Whalesync.
Step 6: Bringing It All Together
With everything in place, we now have an organised database with pages, Webflow CMS collections data, and SEO tags, ready to build a winning Webflow project.
Questions?
That was a quick tour of how we use the Site Migration Plan. If you have any questions or want to get your hands on the Airtable template, drop me a message on Twitter (@dan__marek).